
Do you find it difficult to get your kids to sit still, let alone look at the camera and maybe even shed a smile? Here are five easy tips for taking better iPhone photos of your kids, or anyone for that matter.
1) Candid Moments vs “Smile at the Camera!”
Not all great photos are when your subjects are cheesing at the camera. In fact, most of my favorite photos are more “candid” shots, where the subjects are in their natural environment just being themselves. I find this is when you are more likely to catch genuine emotions. So let your kiddos run around and play and capture them doing what they do best. And if you can catch them in a quiet moment, you could try one of my favorite lines, “don’t smile!”, to see if the fall for it and give you a grin (looking at the camera or not). 😉
2) Rule of Thirds
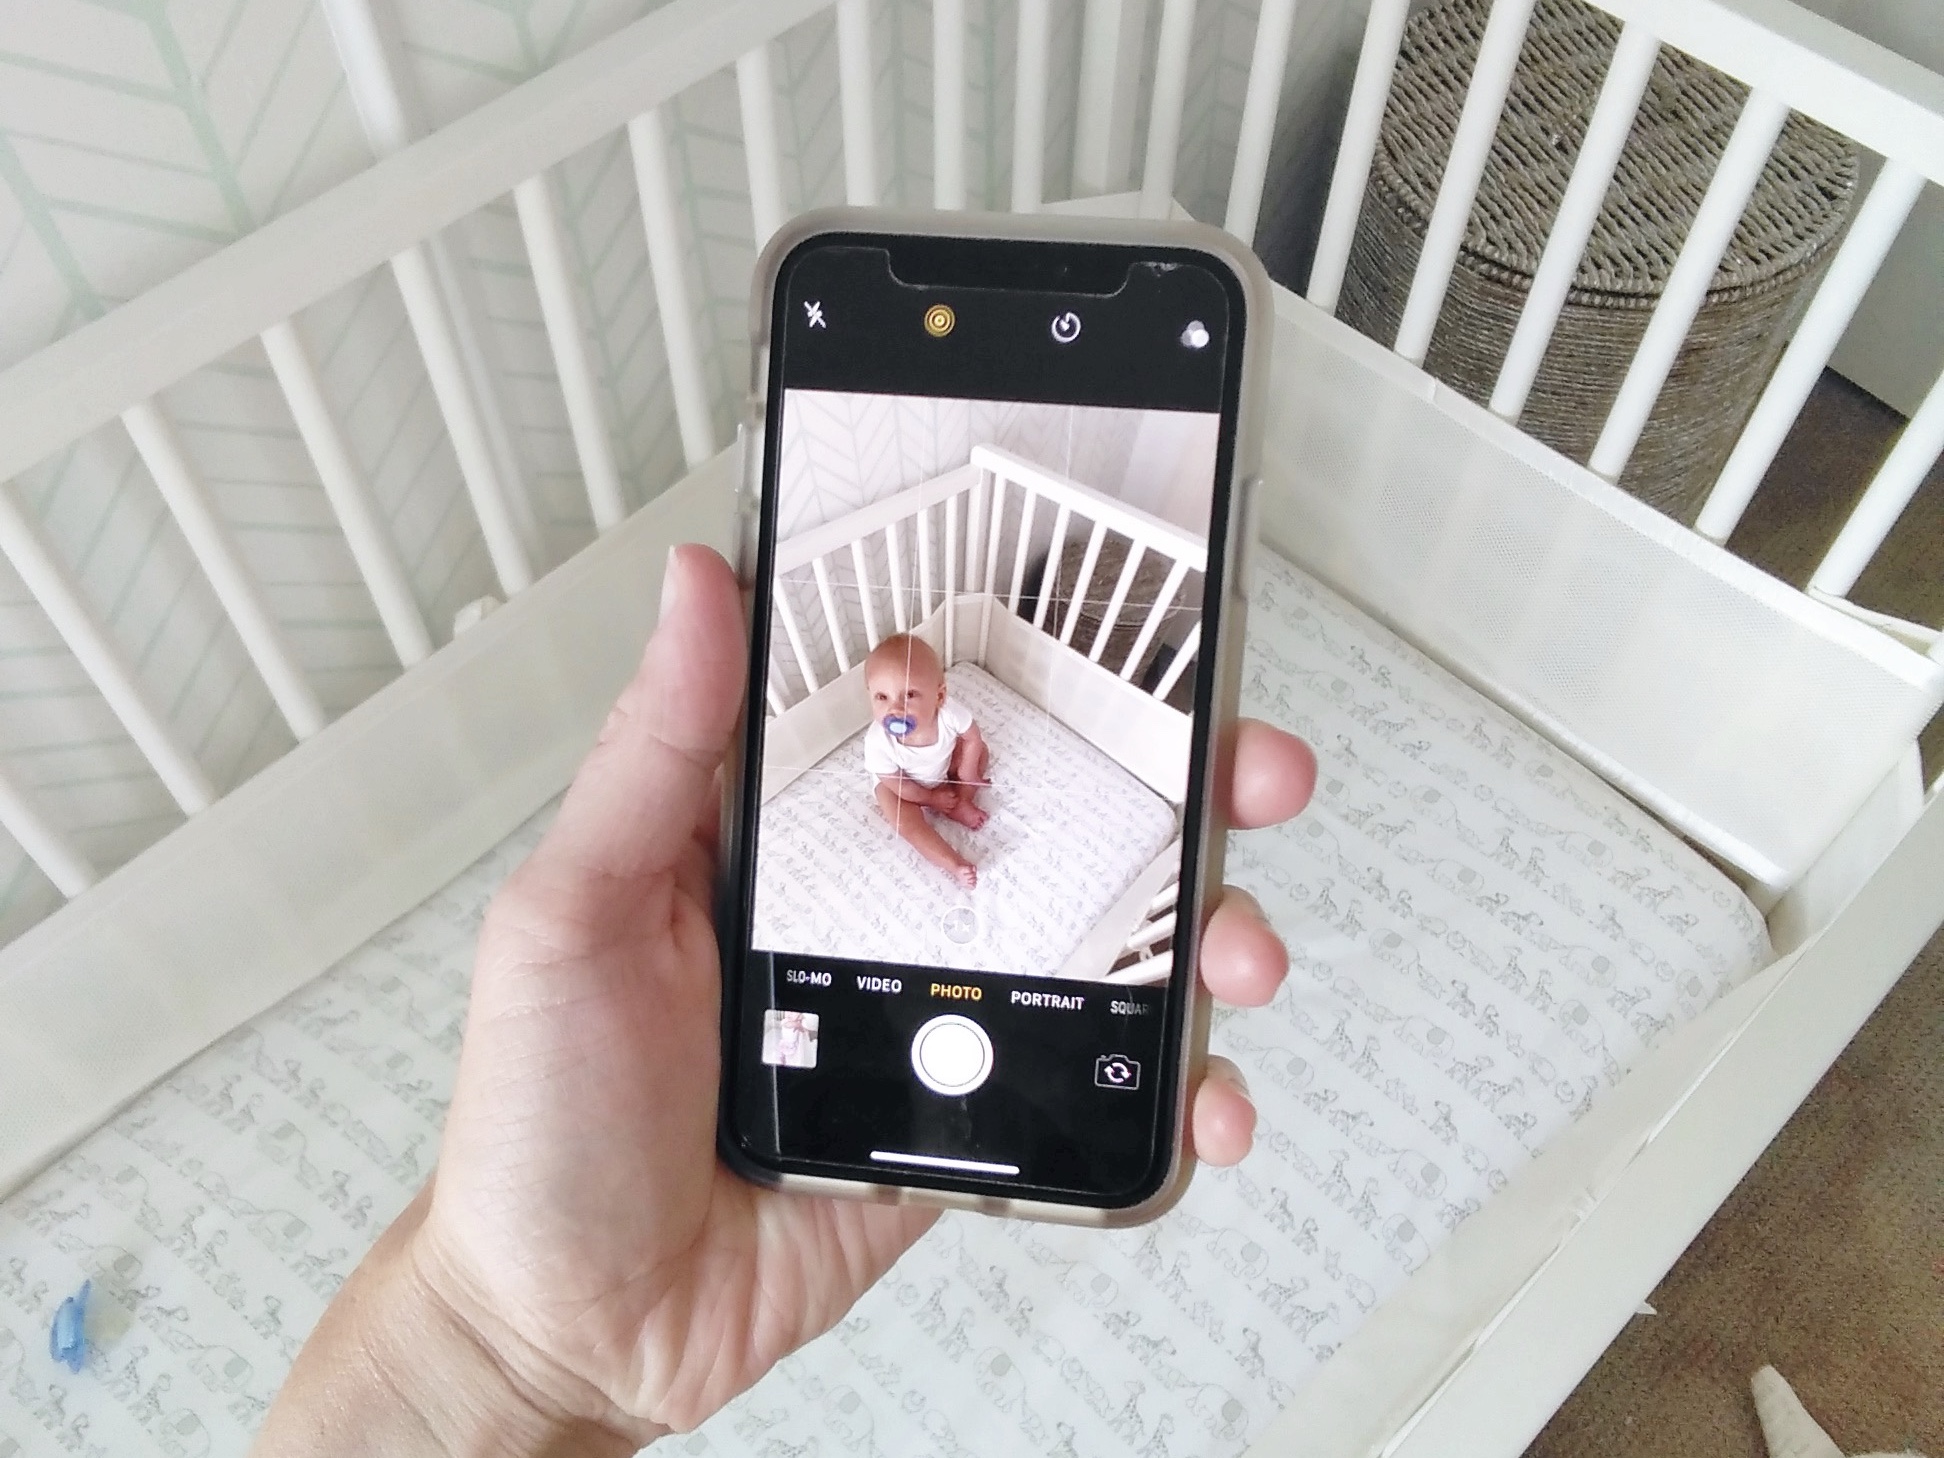
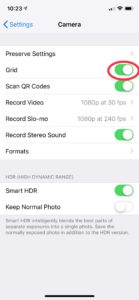
Photos tend to be most aesthetically pleasing when your subject is in a “third” of your grid view. This means that your subject doesn’t necessarily need to be in the center of your photo every time; he/she could be in the right or left third or even the bottom. To help you visualize this while taking a photo, you can add a grid into your camera view by doing the following: Settings > Camera > Grid “on”.
3) Focus
Do many of your photos come back blurry? While your iPhone will try to auto-focus on what it thinks is the subject, it isn’t always perfect. In order to ensure your subject is in focus, tap his/her face on your screen and a yellow box will appear. The yellow box is where the focus is set. If you have multiple subjects in view, just tap one face. Now you can expect more photos to come back in focus. 🙂

4) Live Mode
I can’t tell you how many times I’ve gone back to pick the best photo out of a single photo I took of my daughter, Cora. If you have enabled “Live Mode” on your iPhone camera, it will automatically take a burst of photos for every single photo you take. This is as simple as clicking the “bullseye” icon at the top of your screen when you are in your camera app and ensure it shows yellow. The setting is off if there is a white diagonal line slashed through it.

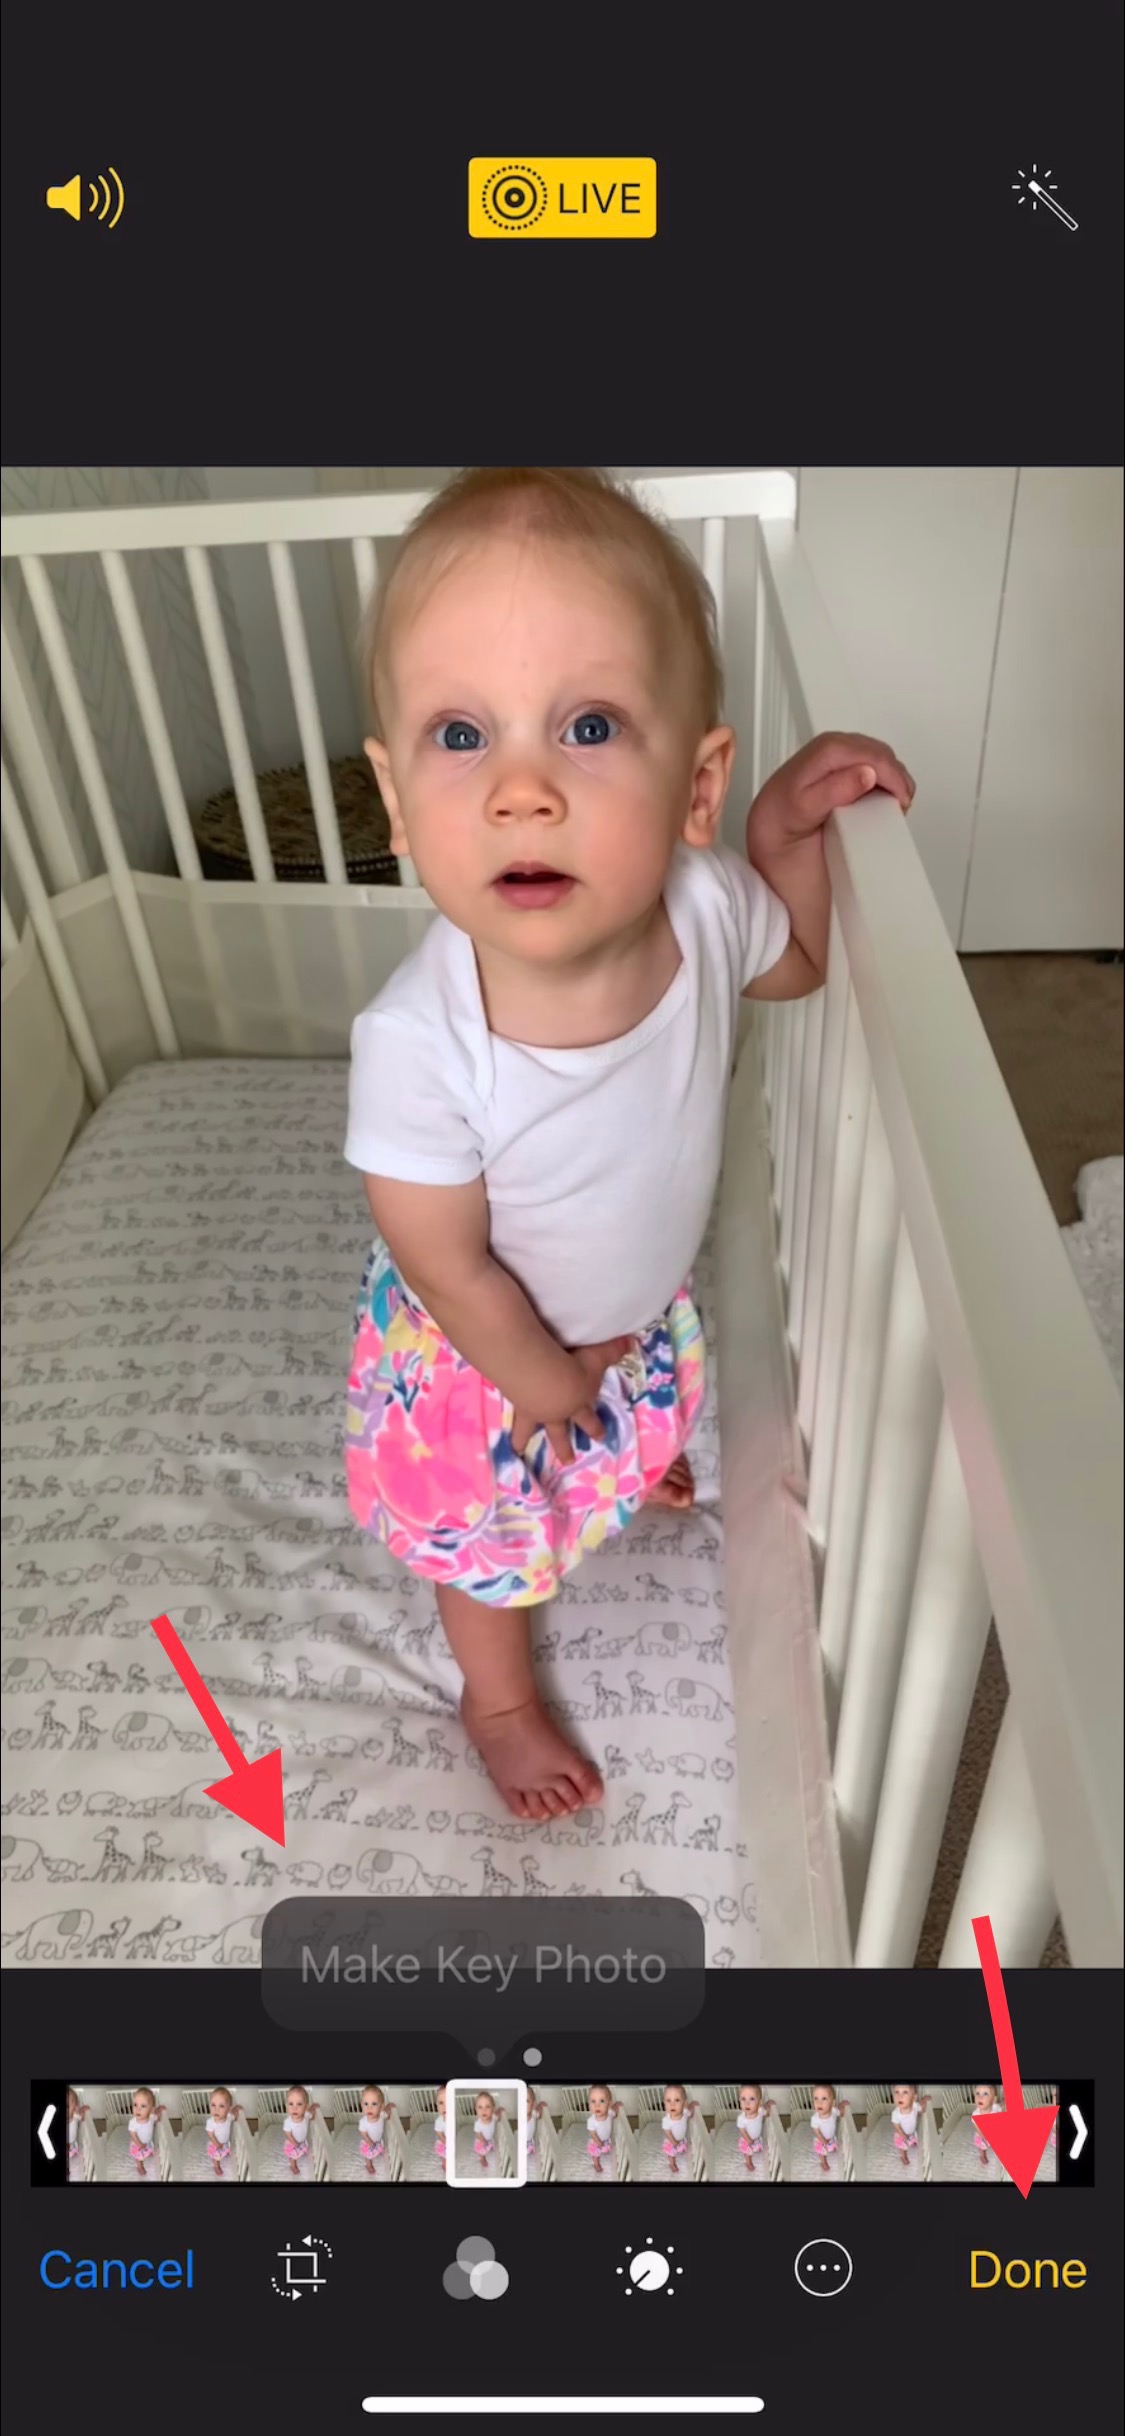
To go back and pick the best photo after you’ve taken a photo with Live Mode on, simply click into a photo and hit “Edit” and then scroll through the photos within the burst at the bottom of your screen until you find the one you like best. Then tap “Make Key Photo” followed by “Done”. You can always go back and change this.

5) Image Straightening
Another quick tip for when you are already in the “edit” feature is to hit the image resizing icon at the bottom. This can allow you to fix an image that might be slightly rotated. Sometimes it will automatically fix this, but you can also manually move the triangle along the bottom to change the angle of the photo.

Questions/comments?! Thanks for reading and stay tuned to learn about how to edit exposure, color, shadow, and more to your photos from your iPhone!
Happy clicking!


[…] Tips for Taking Better iPhone PhotosCreated with Showit© 2019 Katherine Jianas Photography| Design by Jessica […]